Unit
2 - Theatre History
Module
2: Jesters, Tricksters and Fools
Lesson
4 - Learn to Juggle
Introduction:
The
objective of this lesson is to learn how to juggle.
|
Quick
Juggling Facts
·
Juggling is keeping two or more things in the air at one
time by catching and tossing them. This is referred to as
toss juggling.
· In juggling, the objects you throw are called props.
Many people associate balls with juggling, but lots of objects
are used.
· We can only tell when juggling originated by pictures
or stories. The earliest known picture of toss juggling
is from Egypt in about 1994-1781 BC. However, there is a
Greek statue from about 200 BC that shows a man balancing
balls on his body. This likely indicates juggling.
· Common types of toss juggling include cascade and
fountain.
|
Activities:
Activity
1 - Making your own juggling balls:
• Cut the tips of your two balloons
• Fill
one balloon with sand to the point where it gives only slightly
to the touch
• Pull the other balloon over the first so that the openings
are on opposite sides of the new ball
• If done correctly, you will be able to see the bottom of
the original balloon in the whole of the balloon you stretched
over it
Activity
2 - Learning Cascade Juggling:
|
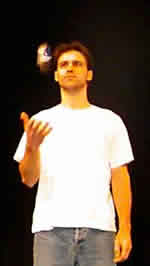
Step
One:
• Stand with your feet shoulder width apart, and toss
one ball back and forth between two hands.
• The ball should have a nice even arc that is slightly
above your head.
• Continue to do this until you do not need to move
your hands much to catch the balls.
Photograph
of Mike Diakuw by Wendy James
|
 |
 |
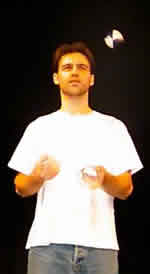
Step
Two:
• Pick up a second ball.
• Hold one ball in each hand.
• Throw the first ball as in step one.
• Throw the second ball when the first ball is at its
highest point.
• Don't catch, let them fall to the ground.
• Keep repeating until the balls fall consistently right
in front of your toes. |
|
Step
Three:
• Repeat step two, but now catch the balls instead
of dropping them.
• Keep repeating until you have a continuos motion
and have to move your hands very little to catch.
Photograph
of Mike Diakuw by Wendy James
|
 |
TIP:
If at any point you find yourself moving, stand about two
feet from a wall and repeat the steps.
Since movement causes pain when you hit the wall, you will
soon stop moving. |
|
Step
Four:
• Add the third ball to your tosses.
• Toss every time a ball reaches the top of the arch.
• Catch with the hand that has just thrown.
• Try to keep your tosses as low or "tight"
as possible and move very little.
Photograph
of Mike Diakuw by Wendy James
|
 |
Evaluation:
While the steps sound easy, a substantial amount of practice
is necessary. Bonus marks are an appropriate reward for this.
Talk to your teacher about how you will be evaluated.