Unit
2 - Theatre History
Module
2: Jesters, Tricksters and Fools
Lesson
4 - Learn to Juggle
Introduction:
The
objective of this lesson is to learn how to juggle.
Objectives:
- to
concentrate during drama experiences
- to initiate out-of-class activities to support in-class work
Resources:
balloons, scissors, and sand or tennis balls, open space and blank
wall
CELs:
COM
Components:
Creative/Productive
Quick
Juggling Facts
Activities:
These
activities are written as instructions for the students. As
the teacher, you should try all of these activities before asking
your students to attempt them:
Making
your own juggling balls:
• Cut the tips of your two balloons
• Fill
one balloon with sand to the point where it gives only slightly
to the touch
• Pull the other balloon over the first so that the openings
are on opposite sides of the new ball
• If done correctly, you will be able to see the bottom
of the original balloon in the hole of the balloon you stretched
over it
Learning
Cascade Juggling:
|
Step
One:
• Stand with your feet shoulder width apart, and
toss one ball back and forth between two hands.
• The ball should have a nice even arc that is slightly
above your head.
• Continue to do this until you do not need to move
your hands much to catch the balls.
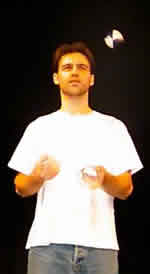
Photograph
of Mike Diakuw by Wendy James
|
 |
 |
Step
Two:
• Pick up a second ball.
• Hold one ball in each hand.
• Throw the first ball as in step one.
• Throw the second ball when the first ball is at
its highest point.
• Don't catch, let them fall to the ground.
• Keep repeating until the balls fall consistently
right in front of your toes.
|
|
Step
Three:
• Repeat step two, but now catch the balls instead
of dropping them.
• Keep repeating until you have a continuos motion
and have to move your hands very little to catch.
Photograph
of Mike Diakuw by Wendy James
|
 |
TIP:
If at any point you find yourself moving, stand about two
feet from a wall and repeat the steps.
Since movement causes pain when you hit the wall, you will
soon stop moving. |
|
Step
Four:
• Add the third ball to your tosses.
• Toss every time a ball reaches the top of the arch.
• Catch with the hand that has just thrown.
• Try to keep your tosses as low or "tight"
as possible and move very little.
Photograph
of Mike Diakuw by Wendy James
|
 |
Instructional
Strategies:
Demonstration, Drill and Practice
Evaluation: Use learning juggle as a potential bonus
opportunity and reward it well. While the steps sound easy,
a substantial amount of practice is necessary. Bonus marks are
an appropriate reward for this. A sample bonus rubric is included
in pdf.
Alternative
On-Line Activity: All
the activities are easily done on-line using available resources.
Instructions for juggling including an animated step-by-step guide
are available at http://www.acm.uiuc.edu/webmonkeys/juggling/
An
excellent write-up on how to juggle (including adaptations for
special need) is found at http://www.uiuc.edu/ro/juggling/bar.html
After
viewing resources material, students could practice the technique
and have a local teacher evaluate the juggling based on the bonus
rubric (pdf). This
could be faxed or e-mailed to the teacher of the course.
Next
Lesson
/
Student Lesson
/Previous
Lesson